 Save to Pinterest
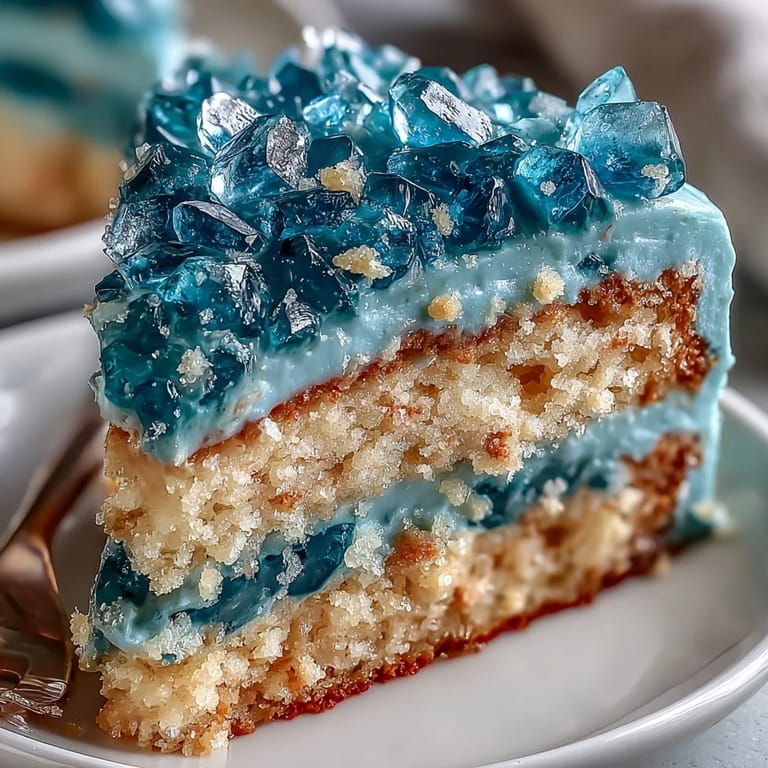
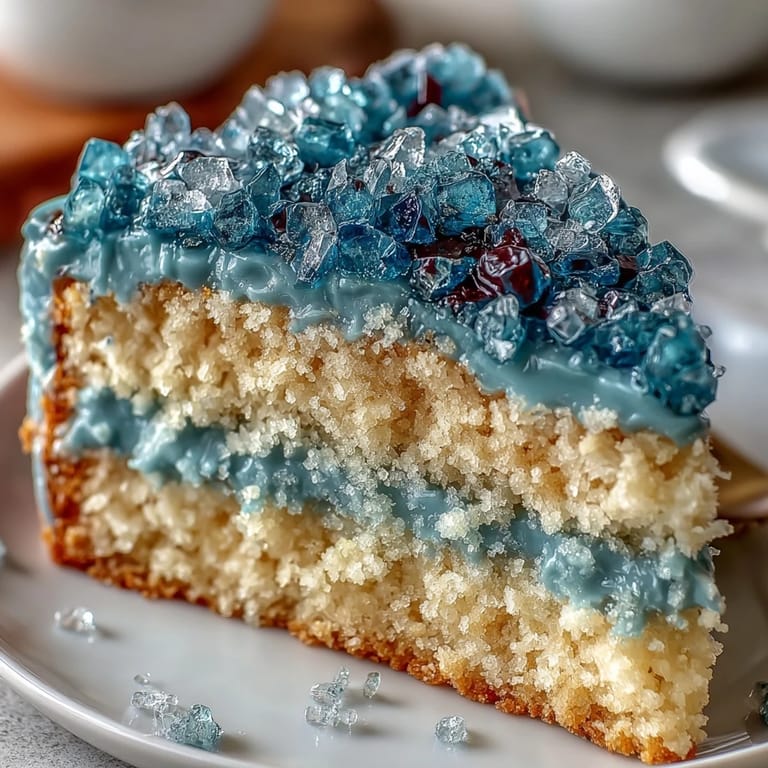
 One afternoon last June, my kitchen buzzed with a nervous, electric energy: between the blare of celebratory playlists and the soft mountain of cake flour on the counter, I decided to try my hand at a teal and gold geode graduation cake. The sunlight poked through the windows, glinting off a tumble of edible rock crystals that looked as magical as they tasted sweet. I wasn’t sure if my amateur geology skills would translate to buttercream geology, but I was giddy to find out. Sometimes, the recipes that feel like art projects are the ones that give your kitchen a sense of adventure. There’s nothing quite like carving a dramatic slice into a pristine cake and transforming it into something dazzlingly unique.
When my cousin finally tossed her cap into the air, this very cake sat center stage—more photogenic than we were, if we’re being honest. The best part was watching her carefully break off a piece of sugared geode, marveling at the edible artistry just as much as the sweet, comforting vanilla underneath.
Ingredients
- All-purpose flour: Provides sturdy structure for neatly slicing dramatic cake layers—be sure to fluff and level for accuracy.
- Baking powder: Gives the cake an airy lift that balances the rich buttercream—fresh is always best.
- Salt: Brightens every bite; I’ve learned a small pinch transforms the flavor from flat to vibrant.
- Unsalted butter (for cake and buttercream): Room temperature butter whips up light, never greasy—set it out before you do anything else.
- Granulated sugar: Creams into the butter, making the crumb moist and the outside just the right amount of golden.
- Eggs: Add richness and color, especially when used at room temperature—crack into a bowl first for easy shell retrieval.
- Vanilla extract: Rounds out the flavors; splurge on pure vanilla if you can.
- Whole milk: Keeps the cake tender and subtle, perfect for showing off bold decorations later.
- Powdered sugar: Sifted well, it keeps your buttercream silky smooth—don’t skip this step.
- Heavy cream or milk (for buttercream): A splash transforms stiffness into dreamy swirls—add slowly until just spreadable.
- Teal gel food coloring: Packs vivid color with just a few drops; always start slow and use a toothpick for control.
- Rock sugar crystals (clear or white): Transform into sparkling geodes with a hint of food coloring and dry hands prevent melting.
- Edible gold leaf or gold luster dust + clear alcohol: The finishing touch for a high-shine, celebratory look—patience and a steady hand required.
- Simple syrup (optional): Adds insurance for ultra-moist layers, especially if the cake will sit before serving.
Tired of Takeout? 🥡
Get 10 meals you can make faster than delivery arrives. Seriously.
One email. No spam. Unsubscribe anytime.
Instructions
- Cake Magic Begins:
- Set out your ingredients and preheat the oven until the kitchen hums with warmth. Grease and line three cake pans, letting parchment hug the bottoms for easy release.
- Whisk & Cream:
- In one bowl, whisk the flour, baking powder, and salt. In another, cream butter and sugar until fluffy and pale, then add eggs one by one and stir in the vanilla, inhaling deeply as the aroma grows.
- Build the Batter:
- Alternate adding dry ingredients and milk, mixing gently so the batter stays light—trust that it’ll come together smooth and glossy. Pour evenly into pans and bake until the tops spring back and smell sweetly golden.
- Cool it Down:
- Let cakes cool for 10 minutes in the pans, then turn out onto racks and resist nibbling as they cool fully.
- Buttercream Dream:
- Beat butter until creamy, then slowly beat in powdered sugar and vanilla; add cream by the spoonful until spreadable. Tint most of it a deep teal, but hold a little back plain for crumb-coating.
- Color Your Crystals:
- Tumble rock sugar into a bowl, add a few drops of teal gel, and stir carefully until they’re evenly colored. Spread them on parchment to dry if needed; enjoy the fleeting spark of color on your fingers.
- Assembly & Stack:
- Level cakes, brush with simple syrup if using, and sandwich with buttercream. Give the whole cake a skim coat, chill for 20 minutes, then frost generously with the teal buttercream—smooth the sides and top with sweeping strokes.
- Geode Transformation:
- Slice a ‘wedge’ from the cake’s side, revealing tiers inside. Spread a bit of buttercream in the cavity, press in colored crystals (lightest at the center, darkest at the edges), and gently shape a geode effect.
- Golden Finish:
- With a food-safe brush, apply edible gold leaf or brush gold luster dust mixed with alcohol around the geode’s edge for a dazzling finish. Add a few extra golden touches, or a graduation topper if your party demands it.
 Save to Pinterest
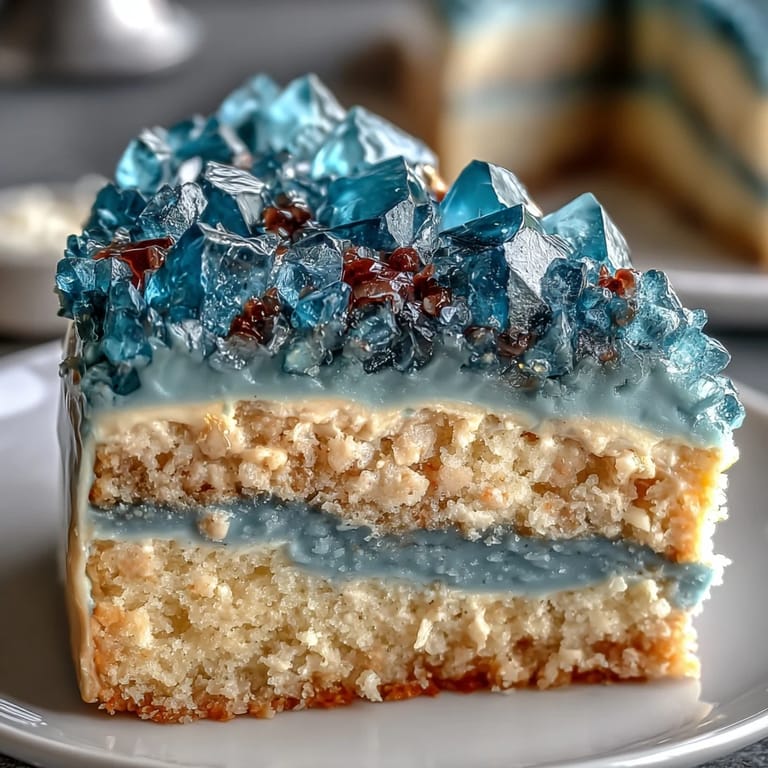
 The cake’s grand reveal sparked a round of applause that rivaled the graduation speeches—watching everyone lean in for selfies and sneak tastes was the kind of celebration that lingers long after the last crumb disappears.
Getting Creative with Colors and Flavors
I once decided to swirl in a touch of blue gel color along with the teal for the sugar crystals, and the depth it brought to the geode was mesmerizing. Changing up the flavor, like swapping in almond or lemon extract, added playful surprises that became new traditions with each celebration.
Careful Carving and Decorating
The first time I carved out the geode wedge, I made it too shallow and the crystals barely clung on; now I carve a decisive pocket, just deep enough for a satisfying crunch and striking look. Taking time with the gold finish is worth every patient minute—brush lightly in one direction for drama, and don’t worry about perfect edges.
Assembly Wisdom: Timing and Tools
Baking the cakes a day ahead changed everything—less stress, and sturdier layers for stacking and carving. Having your tools lined up (offset spatula, parchment, food-safe brush) makes the artistic part fun, not frantic.
- Prep your sugar crystals early for vibrant, dry colors.
- Keep buttercream at the right temp: too soft slides, too cold won’t spread smoothly.
- Leveling cakes and chilling between steps means cleaner, more professional slices.
 Save to Pinterest
 Whether you’re celebrating a milestone or just playing cake artist for the day, this geode cake promises as much fun to make as it is to share. May every slice bring a little sparkle to your special occasion.
Recipe FAQs
- → How do I achieve the geode look?
Use teal-tinted rock sugar crystals pressed into a buttercream-filled wedge on the cake, then accent edges with edible gold.
- → Can I use different food coloring for the crystals?
Yes, combining teal with blue or other shades creates depth and adds a unique effect to the geode centerpiece.
- → What makes the cake extra moist?
Optionally brushing cake layers with simple syrup before assembling keeps each bite soft and flavorful.
- → Which tools are essential for decoration?
An offset spatula, serrated knife, and food-safe paintbrush are helpful for smooth frosting and applying gold accents.
- → Are there flavor variations for the base?
Try adding lemon or almond extract for a brighter or richer cake flavor to suit your taste preferences.